2.4 iOS device connection

iOS-Tagent was developed on the WebDriverAgent project based on Facebook.The purpose is to provide test support for iOS platform on AirtestProject,so the development team carried out customized optimization and function adjustment on the basis of the original project.
If you need to use the airtest project to test the iOS, please prepare a macOS in advance, and use xcode to deploy iOS-Tagent successfully,then you can connect to the iOS phone on a mac or windows machine.Please click link to download the project code to deploy locally.
This project was developed and tested on the following versions:
| iOS | Xcode |
|---|---|
| 10.x-12.x | 10.x |
| ≥ 9.3 | ≥ 9.3 |
Other versions of Xcode and iOS have not been fully tested and may experience unexpected error.
Now this project is in public test state, there will be some problems. If you have questions and feedback for this project, you can create new Issues.
2.4.1 Airtest Api support status
After improvement,iOS - Tagent now can work with AirtestIDE and airtest project.
iOS Api supporting universal airtest:
- start_app: OK
- stop_app: OK
- snapshot: OK
- home:     OK
- touch:    OK
- swipe:    OK
- text:     OK
- wait:     OK
- exists:   OK
- find_all: OK
- assert_exists: OK
- assert_not_exists: OK
With a few exceptions:
- wake: Not supported yet (consider using the 'home' method instead)
- keyevent: Only supports the 'home' event
- clear_app:  Not supported yet
- install:  Not supported yet
- uninstall: Not supported yet
2.4.2 Use Poco to quickly view window views
现在已经支持Poco查看窗口视图功能,可以看下面图片的效果

这个功能可以与 Poco 和 airtest-ide 一同使用达到最好的效果。
请注意,若只部署了wda项目,是无法使用本功能的,请务必确保部署的是我们提供的 iOS-Tagent 项目。
2.4.3 Deployment process
step 1 iOS-Tagent
Create a WebDriver server on your phone that can be used to remotely control iOS devices and locate UI elements
-
a Download iOS-Tagent to your local computer
git clone git@github.com:AirtestProject/iOS-Tagent.git
-
b Open iOS-Tagent with Xcode,and connect iPhone to Mac with data cable
select project,in the menu bar
product->Scheme->WebDriverAgentRunnerselect device,in the menu bar
product->Destination-> Choose your real machine
-
c Start Test,in the menu bar
product->Test. When you see such a log, it means that iOS-Tagent has started successfully.Test Suite 'All tests' started at 2017-01-23 15:49:12.585 Test Suite 'WebDriverAgentRunner.xctest' started at 2017-01-23 15:49:12.586 Test Suite 'UITestingUITests' started at 2017-01-23 15:49:12.587 Test Case '-[UITestingUITests testRunner]' started. t = 0.00s Start Test at 2017-01-23 15:49:12.588 t = 0.00s Set Up
Learn more about how to successfully launch this project from the following:
here and here
step 2 Set proxy
iproxy can map the iPhone port to the computer port, then you can access the port of the phone by accessing the port of the computer.
Under normal circumstances, you need to access the Agent on your mobile phone by setting the usb proxy. You may have problems accessing the mobile phone directly through wifi. For specific reasons, please refer to Issues and detail.
-
a Install iproxy via Homebrew
$ brew install libimobiledevice -
b run iproxy
$ iproxy 8100 8100
After the startup is successful, you can try to access http://127.0.0.1:8100/status in the browser. If the access is successful and you can see some json-formatted mobile phone information, it means the startup is successful. At this point, visit http://127.0.0.1:8100/inspector to see the iPhone screen projected on the browser.
One thing that needs attention, iproxy can only listen to localhost,so if you want to connect to the iPhone using Windows, you can use wdaproxy instead. The specific steps are:
- Connect iPhone to Mac using usb data cable
- Run wdaproxy on Mac, wdaproxy can map iPhone port to Mac port. For specific installation and operation steps, please refer to https://github.com/openatx/wdaproxy
- In the AirtestIDE iOS address input box on Windows, enter the Mac's ip address and port, and click the
connectbutton.
step 3 AirtestIDE
Connect to iPhone via IP, refresh interface in real time, and conduct UI test.
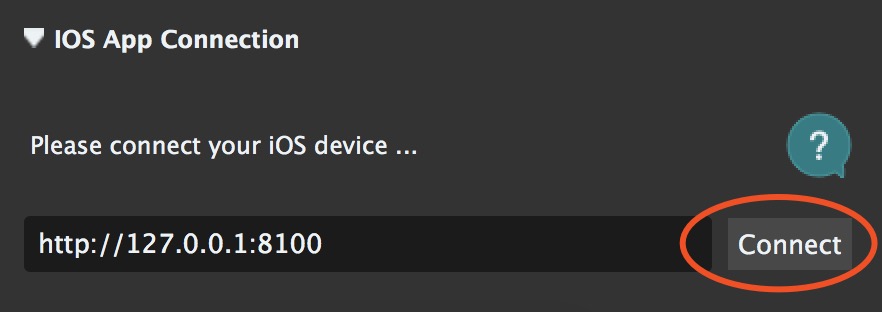
After completing the above two steps, you can fill in the address http://127.0.0.1:8100 in the iOS address bar of AirtestIDE, click connect button to connect the device, and start writing your test script on Airtest .


2.4.4 Q & A
We guess that you will encounter a lot of problems during the deployment process, so we have compiled a Q&A,you can take a look first, if you have questions and feedback for this project, welcome to new Issues.
1. Xcode version issue
2. Apply for a developer certificate
3. Login to developer account
4. Set developer certificate
5. Xcode failed to create provisioning profile
6. First time installation, trust device
2.4.5 License
iOS-Tagent is customized and optimized based on WebDriverAgent:
WebDriverAgent is BSD-licensed. We also provide an additional patent grant.
Have fun with Airtest!


